Understanding Layers
Video Tutorial
Layer Management Tutorial
Learn how to use Launchpad's layer system to organize and manage your property measurements.
Overview
Launchpad's powerful layer system allows you to organize different types of measurements into separate, color-coded categories. Understanding layers is fundamental to effective property measurement and organization.
What Are Layers?
Layers help you organize your property measurements by type and purpose. Each layer has:
- Unique color coding - Easy visual identification on the map
- Specific measurement types - Area, linear, or point measurements
- Individual calculations - Separate totals for each layer type
- Visibility controls - Show or hide specific layers as needed
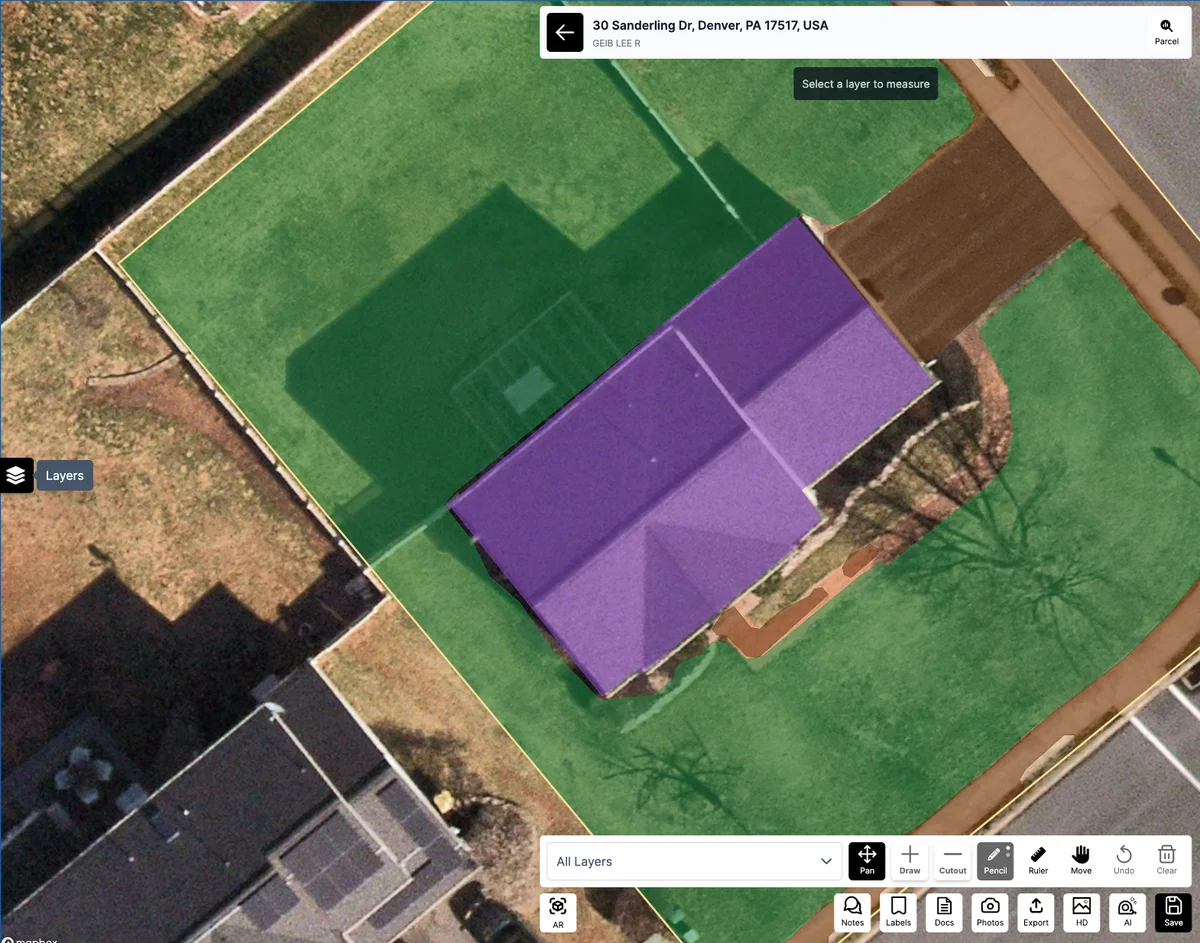
Layer Selection Dropdown
Use the All Layers dropdown to quickly select which layer you want to draw on. Make sure you have the appropriate layer selected before drawing - your measurement will be assigned to the active layer and colored accordingly.
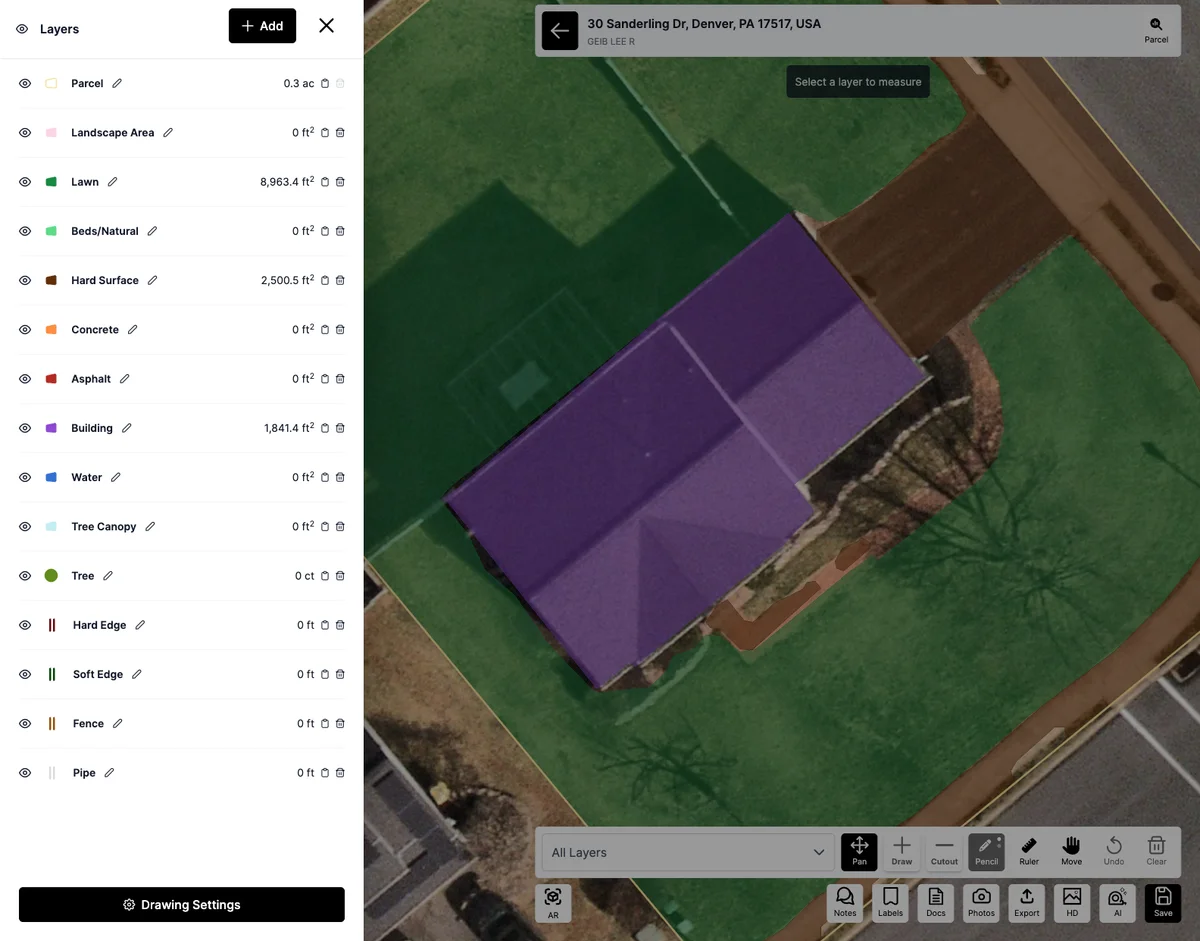
Layers Panel
For more detailed layer management, use the Layers panel on the left side of the screen. This panel gives you full control over all your measurement layers.
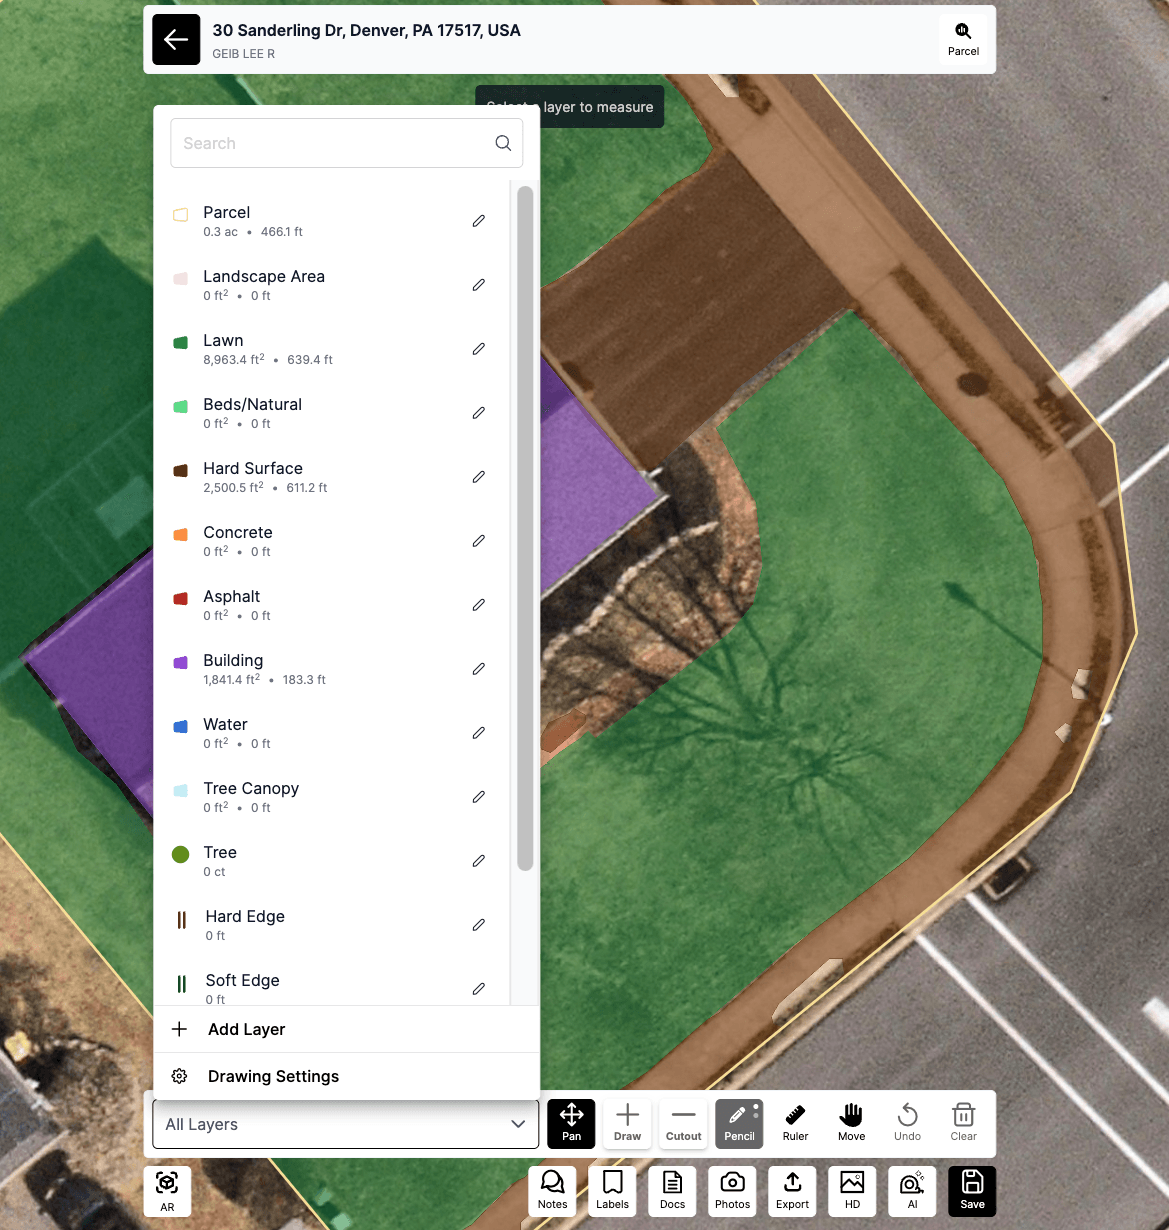
Available Layer Types
Launchpad includes pre-configured layers for common property features:
Property Boundaries
- Parcel - Overall property boundaries
- Hard Edge - Defined boundaries like fences or walls
- Soft Edge - Natural boundaries like tree lines
Landscape Areas
- Lawn - Grass and turf areas
- Beds/Natural - Garden beds and natural areas
- Tree Canopy - Tree coverage areas
- Tree - Individual tree locations
Hard Surfaces
- Hard Surface - General paved areas
- Concrete - Concrete surfaces
- Asphalt - Asphalt surfaces
Structures
- Building - Building footprints
- Water - Pools, ponds, water features
Utilities
- Fence - Fence lines and barriers
- Pipe - Underground utilities and irrigation
Using the Layers Panel Features
Basic Layer Operations
- Select a layer - Click on any layer to make it active for drawing
- View layer totals - See cumulative measurements for each layer type
- Toggle visibility - Use the eye icon to show/hide specific layers
- Edit layer properties - Click the edit icon to modify layer settings
- Add custom layers - Create new layer types for specific needs
- Move polygons between layers - Reassign measurements to different layers (added in v1.7.0)
Moving Polygons Between Layers
Sometimes you need to move a polygon from one layer to another - perhaps you initially drew it on the wrong layer, or the property feature changed. Launchpad makes this easy.
How to Move a Polygon to Another Layer
- Select the polygon you want to move by clicking on it
- The polygon will highlight, showing it's selected
- Right-click on the selected polygon or look for the Edit menu
- Choose Change Layer or Move to Layer from the menu
- Select the destination layer from the dropdown list
- The polygon will immediately move to the new layer and adopt that layer's color
Alternative Method
You can also move polygons using the layers panel:
- Select the polygon on the map
- Open the Layers Panel on the left
- Drag the polygon from its current layer to the destination layer
- Drop it on the target layer
- The polygon updates to the new layer
What Happens When You Move a Polygon
When you move a polygon to a different layer:
- The polygon adopts the new layer's color
- Measurements update in both the old and new layer totals
- The polygon's shape and size remain unchanged
- Any notes or labels attached to the polygon move with it
- The change is saved automatically
Common Reasons to Move Polygons
Correction: You drew on the wrong layer initially Reclassification: The feature type changed (e.g., lawn became a bed) Organization: You're reorganizing your layer structure Client Request: The client wants features categorized differently
Best Practices for Moving Polygons
Check Layer Totals: After moving polygons, verify that layer totals are correct Move Related Features Together: If moving multiple related polygons, move them all at once Update Labels: If you've labeled the polygon, consider updating the label to match the new layer Document Changes: Add a note if the change is significant for project tracking
Layer Management Tips
Choose the right layer - Select the most appropriate layer type before starting your measurements for better organization.
Use color coding - Each layer's unique color helps you quickly identify different measurement types on the map.
Review totals regularly - Check layer totals to ensure your measurements are being categorized correctly.
Hide unnecessary layers - Turn off layers you're not currently working with to reduce visual clutter.
Best Practices
Organization Strategy
Group similar features - Use consistent layer types for similar property features across all your projects.
Name consistently - If creating custom layers, use clear, consistent naming conventions.
Plan ahead - Think about what types of measurements you'll need before starting a project.
Workflow Efficiency
Start with property boundaries - Begin with the Parcel layer to establish overall property lines.
Work systematically - Measure one layer type at a time for better accuracy and organization.
Check your work - Use layer visibility toggles to review each measurement type individually.
Troubleshooting
Measurement in wrong layer? - You can edit measurements to move them to the correct layer after creation.
Can't see a measurement? - Check if the layer is visible using the eye icon in the layers panel.
Layer totals seem wrong? - Verify that measurements are assigned to the correct layers and check for overlapping areas.
Missing layer type? - You can create custom layers for specific measurement needs not covered by the defaults.
Related Articles
Understanding layers is essential for all measurement workflows. Check out these related guides:
Measurement Tools
- Draw Feature - Learn the primary drawing tool for area measurements
- Pencil Feature - Master freehand drawing for irregular shapes
- Cutout Feature - Subtract areas from existing measurements
Measurement Workflows
- Measuring a Property Remotely - Complete remote measurement workflow
- LaunchPad Map - On Device - Mobile measurement process
Settings and Navigation
- Navigation in Launchpad Maps - Learn the Launchpad interface
- Measure Preferences - Configure default layer settings
Understanding layers will improve your efficiency with all these tools and help keep your property measurements organized and professional.
Was this article helpful?